Homeowners today are drowning in digital files, family photos scattered across phones, important documents buried in email attachments, and home security footage eating up cloud storage subscriptions. Network-attached storage (NAS) has long been a staple in business environments, and NetApp’s enterprise-grade technology is now accessible for residential use. Whether you’re managing a smart home ecosystem, running a home-based business, or just tired of “storage full” notifications, setting up a centralized storage system can streamline your digital life without recurring monthly fees.
Table of Contents
ToggleKey Takeaways
- NetApp storage solutions bring enterprise-grade technology to home users, eliminating recurring cloud subscription fees while providing centralized access to files across all connected devices.
- A properly configured NAS system uses RAID configurations and automated snapshots to protect against drive failures, but true data security requires following the 3-2-1 backup rule with offsite redundancy.
- Choosing NAS-rated drives (like WD Red Plus or Seagate IronWolf) and allocating 8GB of RAM ensures reliable 24/7 operation and prevents performance bottlenecks when running applications.
- Organizing data with consistent naming conventions, metadata tagging, and clear folder hierarchies transforms your NetApp storage into a searchable, scalable system that grows with your household’s digital needs.
- Enabling encryption at rest, access control lists, and monitoring logs protects sensitive documents and prevents unauthorized access when remote connectivity is configured.
What Are NetApp Storage Solutions for Home Users?
NetApp traditionally serves enterprise clients, but the principles of their storage architecture, unified file systems, snapshot-based backups, and scalable capacity, translate well to home environments through compatible NAS devices. Think of it as a personal server that lives on your home network, accessible from any connected device.
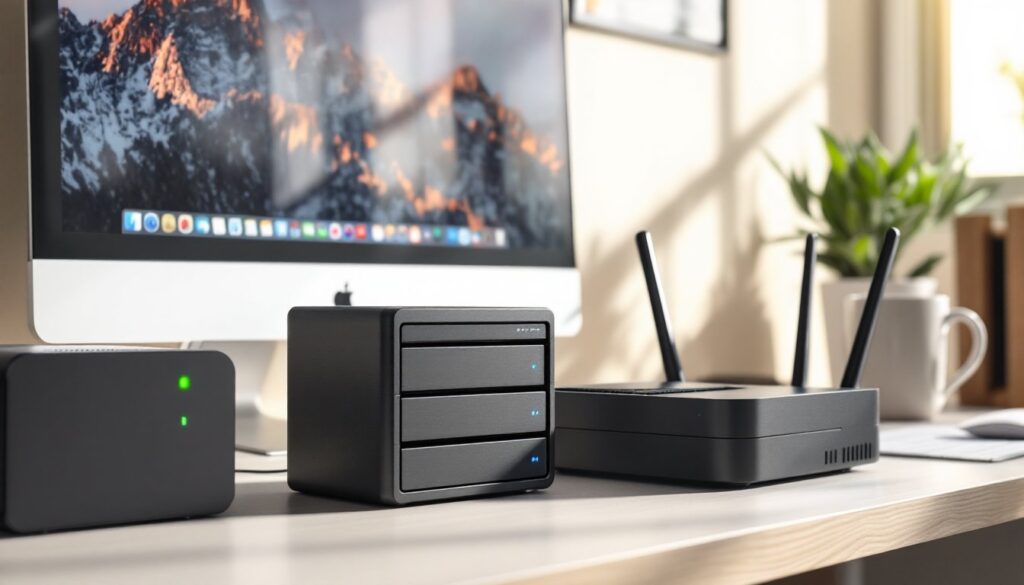
A NetApp-style NAS isn’t a single hard drive connected to your router. It’s a dedicated appliance (or custom-built system) with multiple drive bays, RAID protection, and an operating system designed for continuous operation. You’re essentially creating a private cloud, no third-party access, no bandwidth throttling, and no monthly subscription.
Most residential setups use two to four drive bays with drives ranging from 4TB to 18TB each. The device connects to your router via Gigabit Ethernet (or 10GbE if you’re handling 4K video editing), appearing as a network location on Windows, Mac, or Linux machines. Unlike external USB drives that connect to one computer, NAS boxes serve every device simultaneously, laptops, tablets, smartphones, smart TVs, and security cameras.
The learning curve is steeper than consumer cloud storage, but you gain full control. Installation involves mounting drives, configuring RAID arrays (RAID 1 for mirroring or RAID 5 for capacity with parity protection), and setting up user permissions through a web-based interface.
Key Benefits of Network-Attached Storage in Your Home
Centralized File Management Across All Devices
Stop emailing files to yourself or hunting through three different backup drives. A NAS creates a single source of truth for household data. Family photos upload automatically from phones via mobile apps, tax documents sync from your laptop, and 4K drone footage transfers from your desktop, all landing in one indexed location.
Modern NAS operating systems support SMB, AFP, and NFS protocols, meaning Windows PCs, Macs, and Linux boxes all see the storage natively. Map it as a network drive, and it behaves like a local folder. Most systems also offer web portals and mobile apps for remote access when you’re traveling, though secure configuration (VPN or zero-trust tunnels) is critical if you enable internet access.
For households managing smart home systems, many connected device ecosystems benefit from local storage. Security cameras, for instance, can record directly to the NAS instead of paying for cloud subscriptions. A 2-bay NAS with 8TB of usable storage can hold weeks of continuous 1080p footage, compared to the typical 7-day cloud retention most services offer.
Enhanced Data Security and Automatic Backups
RAID configurations aren’t backups, they protect against drive failure, not user error or ransomware. A proper NAS setup includes automated snapshot schedules (hourly, daily, or weekly) that preserve point-in-time copies of your data. If you accidentally delete a folder or a file gets corrupted, you roll back to a snapshot without third-party recovery software.
For true redundancy, follow the 3-2-1 backup rule: three copies of data, on two different media types, with one offsite. Your NAS becomes one copy: an external USB drive connected to the NAS (for local backups) is the second: and an encrypted cloud backup or a second NAS at a family member’s house (synced via VPN) is the third. Many NAS devices support automated sync to Amazon S3, Backblaze B2, or similar low-cost cold storage.
Encryption at rest is standard on most NAS platforms. Enable AES-256 volume encryption during setup if you’re storing sensitive documents, tax records, legal files, or business data. Be warned: if you lose the encryption key, the data is irrecoverable. Write it down and store it in a fireproof safe or password manager.
Access control lists (ACLs) let you segment storage by user. Create separate shares for kids’ schoolwork, personal finances, and media libraries, each with different read/write permissions. This prevents accidental overwrites and keeps sensitive files off shared devices.
Setting Up Your NetApp Storage System: A DIY Guide
You don’t need to buy NetApp hardware to adopt their storage philosophy. Several NAS manufacturers (Synology, QNAP, TrueNAS) offer systems with NetApp-inspired features at residential price points. Here’s the general workflow.
1. Choose Your Hardware
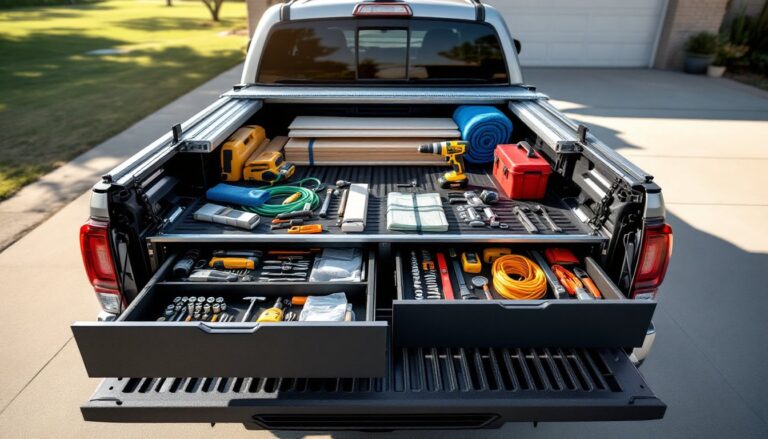
A 2-bay unit runs $200–$350 (diskless), suitable for basic file storage and media streaming. A 4-bay model costs $400–$700, better for RAID 5/6 setups or running virtual machines. Don’t skimp on RAM if you plan to run apps (Plex, Docker containers, surveillance software), 8GB minimum for multi-tasking.
Drives matter more than the enclosure. Use NAS-rated drives (WD Red Plus, Seagate IronWolf) designed for 24/7 operation and vibration resistance. Desktop drives (WD Blue, Seagate BarraCuda) aren’t built for constant read/write cycles and fail faster in NAS environments. Budget $80–$120 per 4TB drive, more for larger capacities.
2. Physical Installation
Place the NAS in a ventilated area, these run warm under load. Avoid enclosed cabinets without airflow. Connect to your router via Cat 6 Ethernet cable (not Wi-Fi: wired connections prevent bottlenecks). Plug into a UPS (uninterruptible power supply) to protect against power surges and allow graceful shutdowns during outages. A 600VA UPS ($60–$90) handles most 2–4 bay units.
Install drives according to manufacturer instructions, usually sliding into tool-less trays. Don’t force connections: SATA ports are fragile. Power on the device and locate its IP address via your router’s admin panel or the vendor’s discovery utility.
3. Initial Configuration
Access the NAS via web browser using its IP address. First-run wizards walk through account creation, RAID selection, and volume formatting. For two drives, choose RAID 1 (mirroring: you get half the raw capacity). For three or more, RAID 5 offers a balance of capacity and redundancy (survives one drive failure). RAID 6 survives two failures but requires at least four drives.
Formatting takes time, initializing and parity-checking a 12TB RAID 5 array can run 8–12 hours. Let it finish before adding data. During this phase, set up user accounts, enable two-factor authentication, and configure firewall rules if you plan remote access.
4. Network Shares and Permissions
Create shared folders for different use cases: Photos, Documents, Videos, Security Footage. Map them to computers as network drives (in Windows: Map Network Drive > NAS-IPShareName). On mobile devices, install the vendor’s app and log in with your credentials.
For households with multiple users, assign read-only or read-write permissions per share. Kids can upload to the Photos folder but not delete Dad’s tax records. Guest accounts work for temporary access without full system privileges.
5. Enable Backups and Snapshots
Schedule snapshots in the NAS settings, hourly for critical data, daily for media libraries. Snapshots consume minimal space initially (they only store changes), but prune old ones monthly to free capacity. Set up an automated backup task to an external USB drive or second NAS.
If syncing to cloud storage, smart home tech platforms often integrate with NAS systems for offsite redundancy. Encrypt uploads before they leave your network, most NAS tools offer client-side encryption.
Best Practices for Organizing Your Digital Home Files
Throwing files into a NAS without structure defeats the purpose. A logical folder hierarchy prevents sprawl and makes retrieval painless.
Top-Level Organization
Start with broad categories:
- Documents (taxes, legal, manuals, receipts)
- Media (photos, videos, music)
- Projects (home improvement plans, renovation docs)
- Backups (phone backups, computer images)
- Surveillance (security camera footage)
Within each, use year-based subfolders for time-sensitive data (e.g., Documents > Taxes > 2026). For photos, organize by event or date (Photos > 2026 > 04_April_Kitchen_Remodel). Avoid generic names like “New Folder” or “Untitled”, future you will curse past you.
Naming Conventions
Use consistent, descriptive file names: 2026-04-15_Water_Heater_Receipt.pdf beats IMG_0392.pdf. Include dates (YYYY-MM-DD format sorts chronologically), project names, and version numbers for iterative work. This habit pays off when searching or filtering by filename.
Metadata and Tagging
Many NAS systems support metadata tagging (Synology Photos, for example). Tag photos by person, location, or project. This creates virtual albums without duplicating files, your kitchen renovation photos can appear in both “2026 Projects” and “Before/After Comparisons.”
Regular Audits
Quarterly, scan for duplicates and obsolete files. Tools like Duplicate Cleaner (Windows) or dupeGuru (cross-platform) identify redundant copies. Delete blurry photos, outdated drafts, and installer files you’ll never use again. A well-organized storage system prevents digital hoarding just as physical home organization does for kitchen clutter.
Access Logs and Alerts
Enable email or push notifications for critical events, drive failures, failed logins, or low disk space. Most NAS platforms log access attempts: review these monthly if you’ve enabled remote access. Unusual activity (logins from unfamiliar IPs, mass file deletions) warrants immediate investigation.
Plan for Growth
Storage needs double every few years. If you’re at 60% capacity, start budgeting for expansion. Some NAS models support capacity upgrades by swapping smaller drives for larger ones (one at a time, letting RAID rebuild between swaps). Others require migrating to a larger unit, plan data transfers during low-usage periods and verify backups before decommissioning old hardware.
Conclusion
A properly configured NAS isn’t just storage, it’s infrastructure. You gain control over your data, eliminate recurring cloud fees, and build a foundation that scales with your household’s digital footprint. The upfront investment (hardware, time, learning curve) pays dividends in reliability and peace of mind. Start small if you’re new to network storage, but don’t skimp on drives or skip backups. Your future self, and your irreplaceable photos, will thank you.