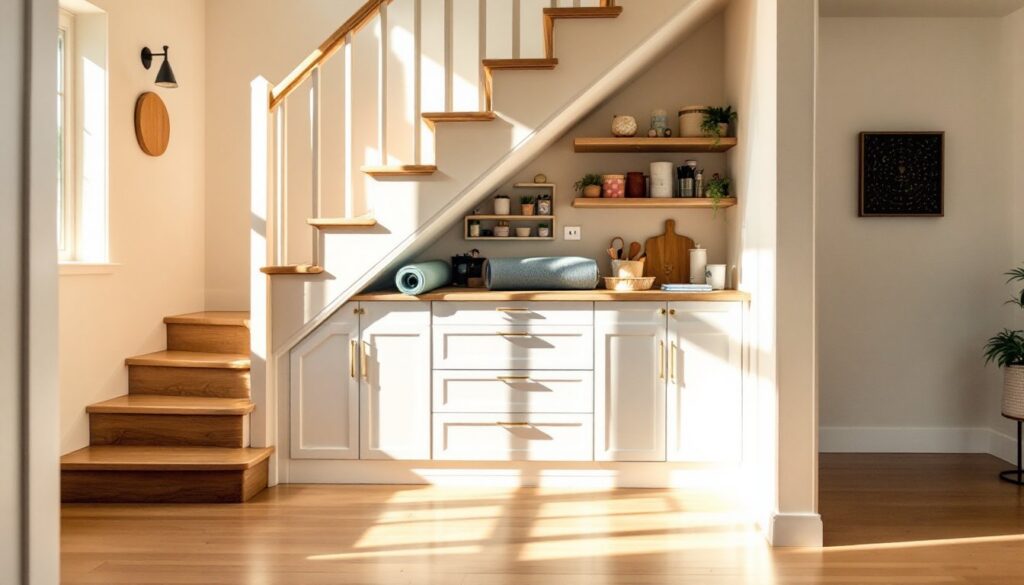
That awkward triangle of dead space beneath your stairs? It’s probably the most underutilized square footage in your house. Whether you’re dealing with a compact entryway or a sprawling two-story layout, the area under your staircase offers surprising potential for storage, workspace, or even a cozy retreat. The difference between wasted space and a functional asset often comes down to a weekend of work and some strategic planning. This guide walks through practical under stair storage ideas, from simple open shelving to full built-in cabinetry, with the measurements, materials, and methods to help homeowners reclaim that forgotten corner.
Table of Contents
ToggleKey Takeaways
- Under stair storage solutions can reclaim 30 to 50 square feet of otherwise wasted space while improving home organization and value.
- Built-in cabinets and custom-framed storage work with your home’s existing structure, requiring careful planning around stringers and electrical runs but delivering seamless, polished results.
- Open shelving with adjustable standards is a cost-effective under stair storage option that requires mounting to studs or stringers and keeping shelves level across angled ceilings.
- Multi-purpose designs—like reading nooks, home offices, or pull-out pantry systems—maximize functionality and transform that awkward triangle of space into a hardworking asset.
- Weekend-friendly projects such as rolling storage bins, simple closet framing, or modular cube organizers offer accessible DIY alternatives for homeowners without advanced carpentry skills.
Why Under Stair Storage Is a Game-Changer for Small Homes
Most staircases occupy 30 to 50 square feet of floor space, and the volume beneath them can rival a walk-in closet. Yet in many homes, it’s either sealed off with drywall or stuffed haphazardly with holiday decorations and sports equipment. Converting that void into organized storage delivers immediate impact: less clutter in living areas, better use of vertical space, and often a noticeable boost to home value.
The geometry matters. A typical residential staircase rises at a 35- to 40-degree angle, creating a sloped ceiling that tapers from full standing height down to less than 12 inches at the toe. That gradient limits furniture options but opens the door for custom solutions tailored to the pitch. Unlike adding a closet or buying freestanding shelves, under stair projects work with existing structure, there’s no need to steal square footage from adjacent rooms.
For homeowners in apartments or older homes with limited storage, this space can solve multiple problems at once. Seasonal gear, pantry overflow, cleaning supplies, or even a compact home office setup all fit beneath stairs if planned correctly. The key is matching the design to the stair configuration and household needs rather than forcing a one-size-fits-all approach.
Built-In Cabinets and Drawers for Seamless Storage
Built-ins offer the cleanest look and the most efficient use of every cubic inch. The downside? They require framing, finish carpentry, and sometimes electrical work if you’re adding interior lighting. But the payoff is a polished installation that looks original to the house.
Start by mapping the stair stringers and any existing wall studs. Most stairs have two or three stringers (the angled beams supporting the treads), and you’ll need to work around them or incorporate them into your cabinet frame. If the underside is currently drywalled, you’ll likely find 2×4 or 2×6 framing along the stringer line. Remove drywall carefully, wear a dust mask and safety goggles, and inspect for plumbing, HVAC ducts, or electrical runs before cutting.
For cabinet construction, ¾-inch plywood (birch or maple veneer) is the standard for carcasses, with ½-inch plywood or MDF for backs. Face frames can be built from 1×2 poplar or pine, then primed and painted to match trim. Drawer boxes benefit from dovetail or box joints, though pocket screws and glue work fine for DIYers. Full-extension drawer slides rated for 100 pounds (like soft-close undermount models) make deep drawers usable all the way to the back.
If the ceiling height allows, stack cabinets vertically: upper cabinets with hinged doors for light items, lower drawers for heavier or bulky goods. Incorporate a toe kick at floor level (typically 4 inches tall) to match kitchen cabinetry standards and allow for easy cleaning underneath. For homeowners tackling similar projects, basement storage strategies often apply to under stair builds, both involve working within awkward dimensions and maximizing vertical reach.
Tools needed: Circular saw or miter saw, drill/driver, pocket hole jig, level, tape measure, clamps.
Safety note: If cutting into walls, use a stud finder and non-contact voltage tester to avoid hidden wires.
Open Shelving and Display Options
Open shelving suits staircases in high-traffic areas or homes where aesthetics matter as much as storage. Without doors to conceal contents, everything on display needs to be intentional, books, baskets, decorative boxes, or curated collections rather than a jumble of miscellany.
The simplest approach uses adjustable shelf standards mounted to wall studs or directly to stair stringers. Standards come in aluminum, steel, or heavy-duty steel rated for different loads: for under stair applications where shelves may hold bins of tools or stacks of books, go with standards rated for at least 50 pounds per bracket. Space shelves 12 to 16 inches apart for flexibility, and cut shelves from ¾-inch hardwood plywood, 1×12 pine, or pre-finished melamine board.
Angled ceilings mean each shelf will have a different maximum depth. Measure from the wall to the stringer or drywall edge at each shelf height, then subtract an inch for clearance. Label each shelf piece during cutting to avoid mix-ups during installation. A miter saw makes quick, square cuts, but a circular saw with a straightedge guide works just as well.
For a modern look, consider floating shelves made from 2×10 or 2×12 dimensional lumber with concealed bracket systems. Stain or paint to match existing trim, then seal with polyurethane for durability. If the staircase has an open stringer (where you can see the stair profile from the side), floating shelves mounted parallel to the treads create a striking visual rhythm.
Keep weight distribution in mind. Drywall anchors won’t cut it for loaded shelves, fasten directly into studs or stringers using 3-inch construction screws. For lighter decorative shelves, toggle bolts rated for 50+ pounds can work in drywall, but always err on the side of overkill when it comes to fasteners.
Materials list:
- Shelf standards and brackets
- ¾-inch plywood or dimensional lumber
- 3-inch screws
- Wood filler, primer, and paint
- Level, stud finder, drill
Creative Multi-Purpose Under Stair Spaces
The best under stair projects do more than store, they add function to otherwise overlooked real estate. With a little framing and finish work, that void can become a workspace, reading nook, or even overflow kitchen storage.
Home Office Nooks and Reading Corners
If your staircase offers at least 60 inches of headroom at the entry point, you’ve got enough clearance for a seated workspace or reading corner. Install a floating desk or wall-mounted work surface (a piece of ¾-inch plywood or butcher block cut to fit the taper works well), add a compact chair, and you’re set. Electrical outlets are essential, if none exist nearby, running a new circuit may require a permit and a licensed electrician, depending on local codes. Surface-mounted LED strip lighting or a wall-mounted swing-arm lamp solves illumination without overhead clearance.
For reading nooks, built-in benches with lift-up seats double as storage. Frame a bench box from 2×4 lumber, top it with a hinged plywood lid upholstered with 2-inch foam and fabric, then add throw pillows and a small bookshelf. The result: a cozy retreat that also hides board games, linens, or off-season clothing.
Platforms like Instructables feature dozens of user-submitted under stair office and nook builds, complete with cut lists and photos. Many designs use pocket screws and standard framing techniques, making them approachable for intermediate DIYers.
Pull-Out Pantry and Kitchen Storage Solutions
Stairs adjacent to kitchens are prime candidates for pantry expansion. Deep, narrow pull-out shelves on full-extension slides turn that awkward wedge into accessible storage for canned goods, small appliances, or bulk dry goods. Commercial pull-out pantry kits are available, but building custom units lets you match exact dimensions.
Frame a cabinet box to fit the opening, then install vertical dividers every 6 to 8 inches to create narrow bays. Mount shelves on heavy-duty drawer slides rated for 100+ pounds, and you’ll have pull-out racks that glide smoothly even when fully loaded. Add a face frame and door to keep contents hidden, or leave it open for quick-grab access.
Another option: a pull-out spice rack or lazy Susan setup, similar to corner cabinet solutions but adapted for the under stair footprint. Rotating shelves maximize corner access, and soft-close hinges prevent slamming.
Important: If adding cabinetry near a kitchen, check local building codes. Some jurisdictions require fire-rated drywall or additional ventilation if combustibles (like pantry items) are stored beneath enclosed stairs.
DIY Under Stair Storage Projects You Can Tackle This Weekend
Not every under stair project requires custom cabinetry or a contractor. Here are three approachable builds most homeowners can complete in a weekend with basic tools.
1. Rolling Storage Bins on Casters
Build shallow plywood boxes (think 12 inches tall, 18 inches wide, 24 inches deep) and mount heavy-duty locking casters on the bottom. These roll in and out for easy access and work especially well under stairs with low clearance where standing shelves won’t fit. Add rope handles or cutouts for pulling, then paint or stain to match your décor. Total cost: around $40–$60 per bin depending on plywood grade.
2. Simple Closet Framing
If you just need a coat closet or broom cupboard, framing a basic enclosure is straightforward. Run a 2×4 sole plate along the floor (fastened with 3-inch screws into floor joists or subfloor), then install vertical studs every 16 inches on center, tying into the existing stair framing or adjacent walls. Top with a 2×4 top plate, add a pre-hung door, and finish with drywall or beadboard. For detailed framing steps, Ana White’s under stair closet guide offers free plans and cutting diagrams.
3. Modular Cube Shelving
Pre-fabricated cube organizers (the kind sold for closets or kids’ rooms) can be stacked and secured to fit under stair angles. Anchor each unit to wall studs with L-brackets to prevent tipping, then fill cubes with fabric bins or baskets. This approach requires zero cutting and minimal tools, just a drill, level, and stud finder. It’s ideal for renters or anyone wanting a reversible solution.
General tips for weekend builds:
- Measure twice, cut once. Under stair dimensions are rarely square or symmetrical.
- Acclimate lumber indoors for 48 hours before cutting to minimize warping, especially in humid climates.
- Pre-drill all screw holes to avoid splitting, particularly near board ends.
- Use a combination square to check for square on every joint, small errors compound quickly in tight spaces.
- Wear hearing protection when using power saws in enclosed stair areas: sound reverberates.
For more project inspiration and techniques, Fix This Build That publishes detailed woodworking plans with material lists and step-by-step photos, many of which adapt well to under stair applications.
The right project depends on skill level, available tools, and how much time you want to invest. A rolling bin build might take three hours: a full built-in closet could stretch across two weekends. Either way, the result is the same: reclaimed space that works as hard as the rest of your home.